
Automatic lubrication8 min read
Before You Fit an Automatic Lubricator, Prove the Grease Path
The label records activation. The grease, setting and path determine delivery. Settle all three for one point, then agree how delivery will be checked.

In this article
A new automatic lubricator has been fitted to a bearing housing. The dispensing period is set, the date is on the label, and the job card is ready to close. So far, the record confirms installation and activation.
Delivery still needs to be checked. An empty line takes the first grease before any reaches the bearing. A leaking fitting lets it escape along the way. Both can lower the reservoir level, giving the reassuring appearance of a unit doing its job. A blocked or restrictive passage creates another problem: backpressure that the lubricator may struggle to overcome.
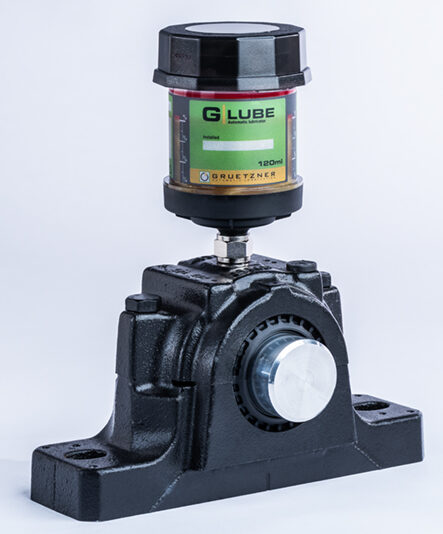
The checks below follow one lubrication point from preparation to the first accepted delivery check. They use the G-LUBE single-point lubricator in the LubeServ catalogue and the limits in its user manual. For another model, start with that model's instructions, even if it belongs to the same catalogue family.
Start with the bearing's requirement
Start with the lubrication instruction for the bearing: the approved grease, the quantity and interval or rate, and the operating conditions behind them. Those details determine the choice of unit and setting. A container size or the setting on a neighbouring machine cannot supply a missing requirement.
If the instruction is missing, ask the engineer responsible for the machine to establish it before fitting the lubricator. For a hot location or hazardous area, check the unit's temperature limits and explosion-protection warnings at the same time.
G-LUBE is an electronically controlled, gas-driven single-point unit. It comes in 60, 120 and 240 ml sizes, with dispensing periods of 1, 3, 6, 9 or 12 months. The dispensing chart lists a 120 ml unit set to three months at 1.33 ml a day.
Compare that chart output with the bearing's requirement using the same units and time period. If the machine instruction is in grams, obtain the grease manufacturer's density value before comparing it with millilitres. A setting can be read correctly and still be wrong for the point.
Use the grease's full product name on the record. Colour and NLGI grade do not establish its identity or compatibility. Gruetzner supplies G-LUBE with standard or customer-specified lubricants; users can also fill units with oils or greases up to NLGI class 2. In either case, the order or filling record should identify what is inside.
The manual requires the grease in the machine and the grease in the unit to be the same or compatible. If nobody can identify the grease already in the bearing or line, settle that and any changeover requirement before installation.
Prepare the path before the unit goes on
Section 2 of the G-LUBE user manual starts with the grease path. The line must be completely filled and free of blockages. The manual calls for cleaning around the point, using a manual grease gun to clear the passage and purge hardened grease, then removing the grease nipple and fitting proper connectors.
Follow the machine's approved isolation and lubrication procedure, and keep open connections and removed fittings clean. Never loosen a pressurised connection on a running machine to look for grease. If the manual grease gun cannot clear the passage, stop and find the obstruction rather than applying more pressure.
A successful grease-gun check shows that grease passed through the passage under the gun's pressure. It does not establish what will happen after connectors and a remote line are fitted. The lubricator must then feed the complete route within its 5 bar backpressure limit. A passage that accepts grease from a gun can still demand more pressure than the unit can provide, which is why line length, bore and bends need their own check.
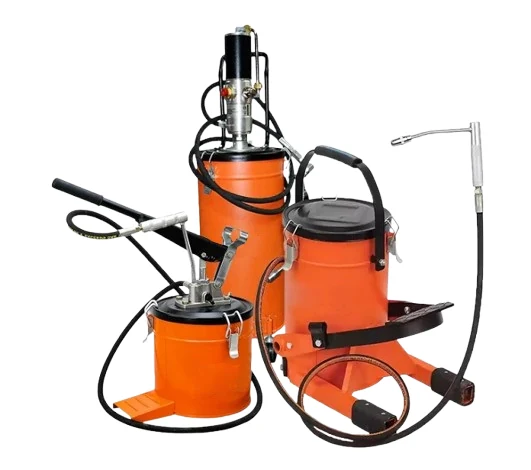
Any tool used to clear the passage or prefill a line should carry the same grease as the lubricator, or one confirmed as compatible. The G-LUBE manual names a manual grease gun for the passage check.
Keep the mounting inside the manual's limits
Section 3 of the G-LUBE user manual prefers direct mounting. If the point cannot accommodate the unit, it permits remote mounting with appropriate accessories. The limits below apply to the 60, 120 and 240 ml units; the tube bore and distance limits apply specifically to remote mounting.
Check the manual revision before using these limits on a job. The English manual linked from Gruetzner's product page has a 2026 web address and file properties, but its printed revision is Revision 3, dated 25 June 2021. Ask the supplier to confirm that it applies to the units received. G-LUBE VIB, G-LUBE OIL, SOLOLUBE and multi-point systems each need their own instructions.
A proposed route with a longer line, a tee or a restrictive fitting needs to go back to the supplier for a different arrangement or system. Reducing the dispensing period does not bring that route within the mounting limits.
Make the point and route decisions before activation. The manual prohibits reuse and says an installed, activated unit must not be removed and fitted to another lubrication point.
Plan the first delivery check before activation
The manual describes a start-up period before the first dispensing. Its length varies with the dispensing volume, unit size and operating temperature. The dispensing chart also notes that output can vary with ambient temperature, atmospheric pressure, lubricant consistency and tube length. There is no single start-up time in the manual to copy onto every job card.
Agree the delivery check before starting the unit. The plan needs four details: what will show that grease has reached the point, when to check, who accepts the result, and what to do if delivery cannot be confirmed. Use the manual and the supplier's advice for the actual unit and grease.
Where the bearing cannot be seen or reached, settle the method with the supplier and site. Do not improvise by disconnecting a line or waiting for grease to appear past a seal. The person responsible for the machine must also know how the bearing will be lubricated during start-up, before the machine returns to normal service.
Trace the complete path
From the unit to one lubrication point
- 1. UnitCorrect grease.
Agreed setting. - 2. ConnectionClear passage.
No leakage. - 3. Bearing housingConfirm delivery
at the point.
Record what the next person will need
The label carries two dates required by the manual: installation and scheduled lube-cycle completion. The maintenance record needs to carry what the label cannot: which grease was fitted, why that setting was chosen, and how delivery was checked. Keep the record against the individual lubrication point and identify the instruction it follows.
Suggested record for one lubrication point
- Machine and point
- Asset ID, bearing or point ID, and a photograph that makes the location unambiguous.
- Lubricant
- Exact product in the unit, the line and the machine, and the changeover instruction if the grease was changed.
- Unit and manual
- Model, size, any serial or batch details, and the manual revision followed.
- Requirement and setting
- The required quantity and interval or rate with its source, and the dispensing period selected. Keep them as two entries.
- Path
- Direct or remote mounting; tube bore and length, fittings and adapters; how the passage was checked and the line prefilled.
- Dates
- Date received, date and time activated, planned first check and scheduled completion. The manual asks for activation within one year of receipt and storage at no more than 40 °C.
- Delivery check
- How delivery was checked, the result, the machine state, any leak or damage, and dated photographs.
- Responsibility
- Who fitted the unit, who accepted the result, and who acts if the next check is not satisfactory.
Use the site's work instruction to decide which entries are mandatory. The aim is a record the next technician can act on. "Automatic greaser fitted" leaves them guessing whether the grease changed, the line was filled or the first delivery check is still open.
Inspect the point as well as the unit
The manual calls for regular visual inspection of both the device and the lubrication point during operation. An inspection route should therefore follow the complete installation: unit, connections, remote line where fitted, and the point itself.
G-LUBE can be re-adjusted or switched off during operation, according to the manual. Record any change to the dispensing period, with its date and reason. Otherwise, the next visit may compare the reservoir level against a setting that no longer applies.
Record the reservoir level alongside the agreed delivery check and any leaks, damage or changes in the machine. Level, noise or temperature alone cannot establish how much grease arrived. If the evidence is unclear, leave the result as "delivery not confirmed" and raise it through the site procedure.
Verification also matters in other automatic systems. Reliability Engine's discussion of self-healing liquid cooling loops follows a controlled response through to checking whether the loop moved back towards healthy operation. The equipment and procedures differ from bearing lubrication, but both require evidence of the result after an action has been taken.
Begin with one point
Start with one point due for a lubricator. Establish its requirement and grease identity, check the proposed path against the unit's manual, and agree the delivery check. Then fit and activate the unit under the approved procedure. Close the commissioning record when the check has been completed and accepted. The next technician can then see the setting, the checks and the result for that point.
Automatic lubricators
Discuss one lubrication point with LubeServ
Bring the point's lubrication requirement, approved grease, operating conditions and proposed remote-line arrangement. A photograph of the connection helps LubeServ review how the unit will fit and how grease will reach the point.
References
- Gruetzner GmbH. G-LUBE user manual, 60, 120, 240 ml (English, PDF). Printed as Revision 3, 25 June 2021; the file and its web address date from 2026. Section 2 covers installation, start-up and disposal, section 3 mounting, section 4 important information on operation and inspection, and section 5 the dispensing chart.
- Gruetzner GmbH. G-LUBE product page. Drive principle, sizes, dispensing periods and filling options. Checked 11 October 2026.
- Reliability Engine. Self-Healing Liquid Cooling Loops for AI Data Centers. Related reading on verifying a controlled response in a different application; not a lubrication source.